
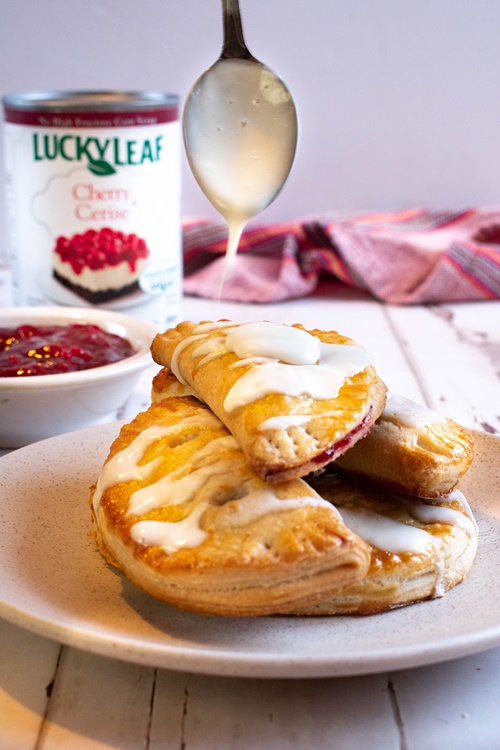
4-Ingredient Cherry Hand Pies
Our Cherry Hand Pie recipe is the easiest way to make pie. They feature a delightful sweet filling encased in a buttery, flaky crust. While we’ve chosen Lucky Leaf’s luscious Cherry Filling, the possibilities are endless – Try with one of the other Lucky Leaf filling such as apple, peach, or blueberry.
A hand pie is essentially a miniaturized version of its larger counterpart, combines a small amount of filling with a circular piece of pie dough. After folding and sealing, these bite-sized treats are baked to perfection – a easy way to make pie, without the fuss. You’ll be pleasantly surprised by how much simpler they are to make compared to a full-sized pie.
These hand pies are a perfect dessert option for any gatherings. No need for pie-cutting and serving – just display them, and guests can easily help themselves to these delectable treats! They are also easy enough for kids to make them.
Hand Pies: Our Step-by-Step Guide
Preheat your oven to 350ºF and line a cookie sheet pan with parchment paper or a silicone baking mat.
Sprinkle some flour on your workspace. Commence by gently pressing your dough with the rolling pin to initiate the flattening process.
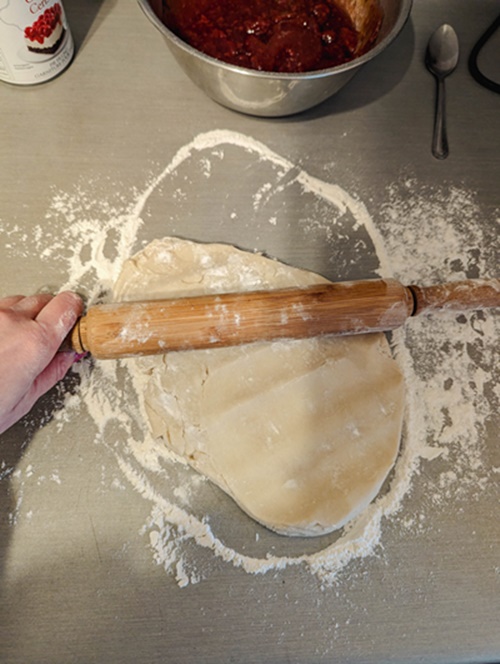
Roll your dough to a thickness of ⅛ inch. A slimmer dough yields a crispier, crunchier crust for your hand pies.
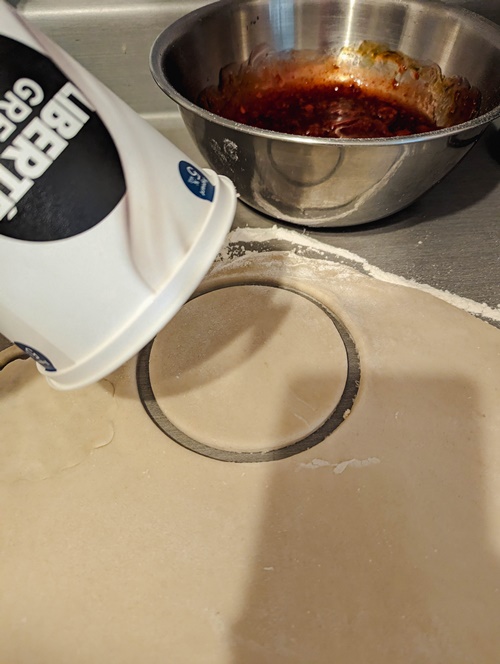
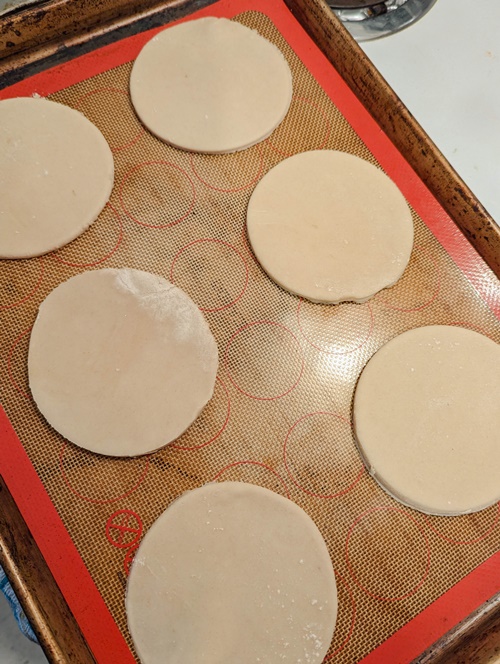
Cut your dough into circles. We used a yogurt container (makes 4 1/2”) as a template but you can use the ”pie cutter” of your choice.
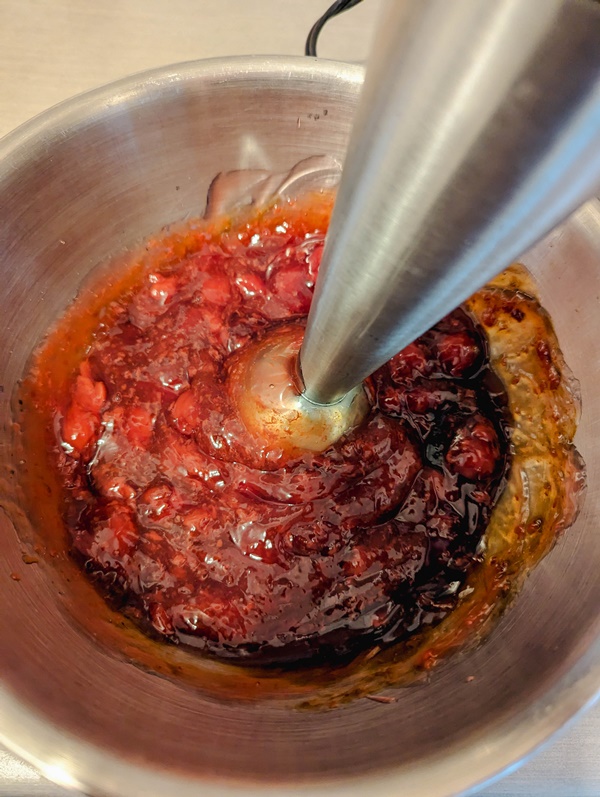
Transfer the pie filling to a bowl and use a hand mixer until you get a smooth, jam-like consistency. Add the molasses and mix.
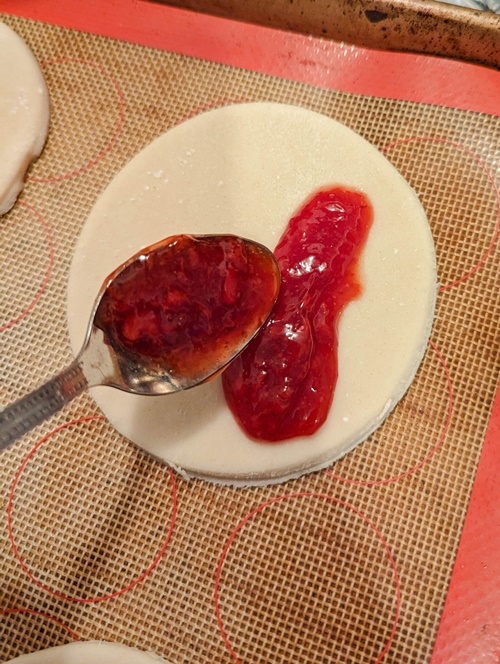
Fill your 4 1/2″ hand pie with 2 tablespoons of fruit filling. Do not overfill.
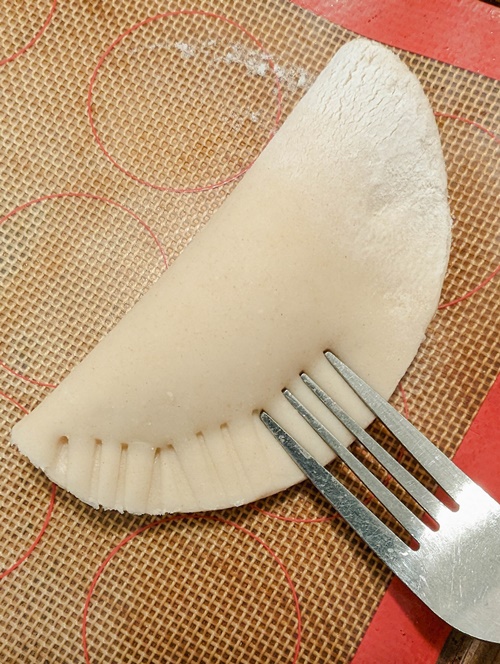
Enclose the hand pie by folding it over and use a fork to create a secure seal.
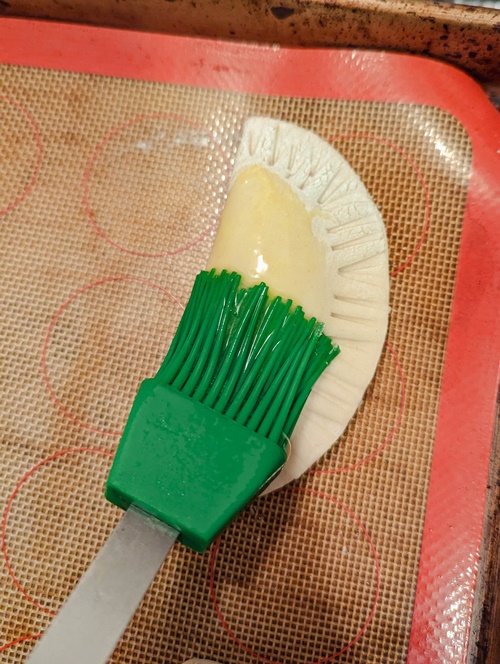
Brush the outside edge with egg wash (one egg whisked with 1 tablespoon of cold water)
Bake for 15 minutes. They should be golden brown.
Let your hand pies cool for 10 minutes.
While your hand pies are cooling, make your glaze. Just whisk the powdered sugar and lemon juice together until smooth. You can also mix Greek yogurt with powdered sugar (equal parts).
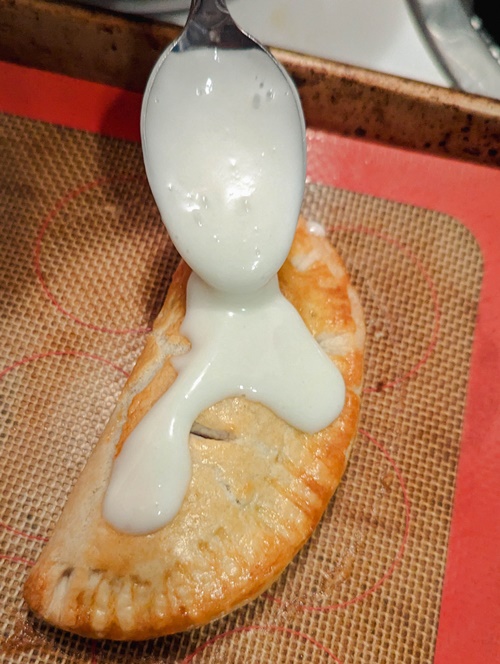
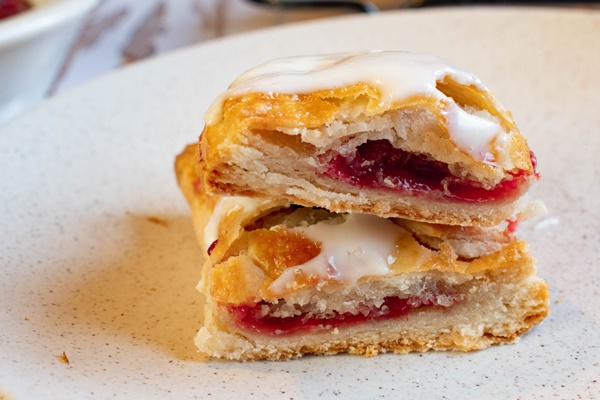
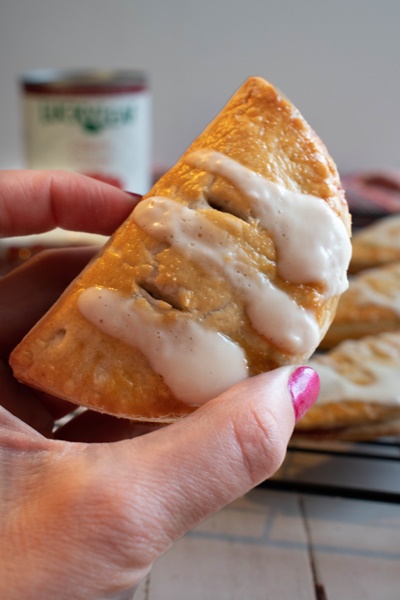
Drizzle the glaze over the hand pies and enjoy!
4-Ingredient Cherry Hand Pies

Enjoy our tasty cherry hand pies – a delightful fusion of sweet cherry filling hugged by a buttery, flaky crust. Skip the slicing hassle and relish the goodness of a classic cherry pie in a portable form. Easy to whip up, these hand pies make for a delicious treat anytime, anywhere.
- Prep Time: 10 minutes
- Cook Time: 15 minutes
- Total Time: 25 minutes
- Yield: 12–14 hand pies 1x
- Category: Candy & Sweet Treats
Ingredients
- 1 can of Cherry Lucky Leaf Pie Filling (you can also use peach, blueberry or any flavour you like)
- 2 tablespoons of Crosby’s Molasses
- 2 cups of store-bough pie dough (you can also make your own)
- 1 egg
Instructions
- Preheat your oven to 350ºF and line a cookie sheet pan with parchment paper or a silicone baking mat.
- Sprinkle some flour on your workspace. Commence by gently pressing your dough with the rolling pin to initiate the flattening process.
- Roll your dough to a thickness of ⅛ inch. A slimmer dough yields a crispier, crunchier crust for your hand pies.
- Cut your dough into circles. We used a yogurt container (makes 4 1/2”) as a template but you can use the ”pie cutter’ ”of your choice.
- Transfer the pie filling to a bowl and use a hand mixer until you get a smooth, jam-like consistency. Add the molasses and mix.
- Fill your 4 1/2″ hand pie with 2 tablespoons of fruit filling. Do not overfill.
- Enclose the hand pie by folding it over and use a fork to create a secure crimped seal.
- Brush the outside edge with egg wash (one egg whisked with 1 tablespoon of cold water)
- Use a knife to make some vents on top
- Place your hand pies onto the prepared sheet pan lined. If your pie dough is at room temperature, chill for 20 minutes. If it is cold, go to the next step.
- Bake for 15 minutes. They should be golden brown.
- Let your hand pies cool for 10 minutes.
- While your hand pies are cooling, make your glaze. Just whisk the powdered sugar and lemon juice together until smooth. You can also mix Greek yogurt with powdered sugar (equal parts).
- Drizzle the glaze over the hand pies and enjoy!
Notes
While these hand pies are most delectable on the day of baking, they can maintain their freshness for up to three days when stored in an airtight container in the refrigerator. You can also freeze them for up to two months.
This recipe was inspired by Sugar Geek Recipes’ Hand Pies recipe.

marie
Is that a hand held blender that you use to
puree the pie filling?
Crosby Molasses
Yes. We used a hand-held blender. I hope you enjoy this recipe! -Marie from Crosby’s Kitchen
Shirley
I am assuming that the molasses goes into the pie filling. I don’t see any directions for using the molasses.
Crosby Molasses
Oups! We forgot to add our precious molasses! Thank you for letting us know. I fixed it. -Marie from Crosby’s Kitchen