Bear Paws | Old Fashioned Soft Molasses Cookies
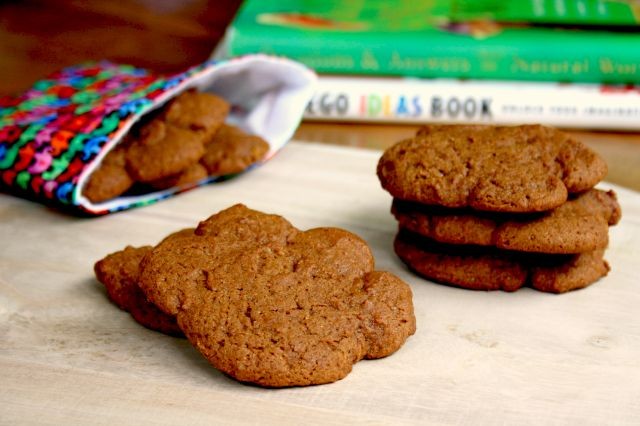
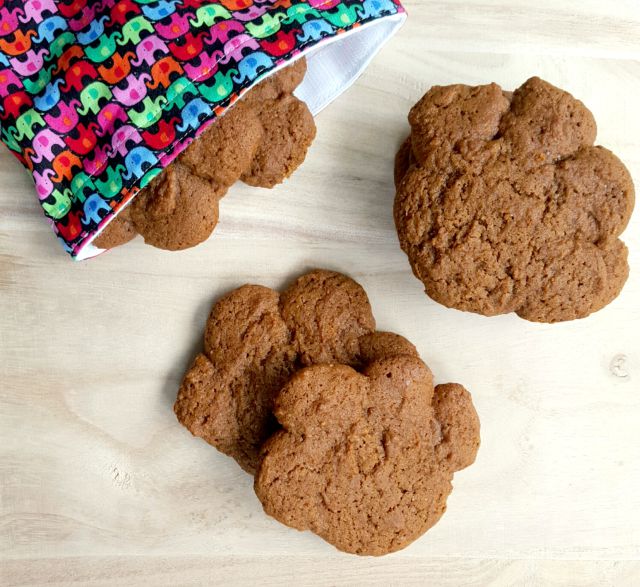
These soft molasses cookies are along the lines of the lovable Bear Paws cookies.

We are not sure if it’s the cake-like softness of Bear Paws that draws me to these cookies or the cute name.
Whatever, it is they’re irresistible.
These are definitely good lunchbox and after school snack cookies.
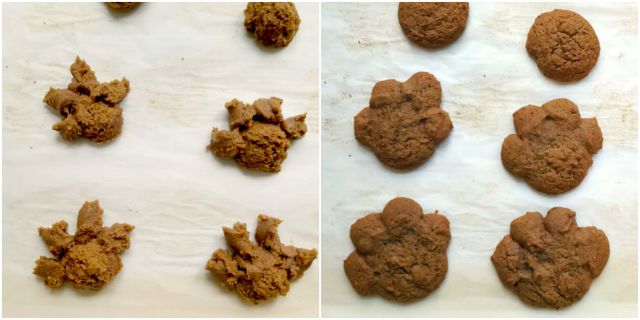
Even though they take a little bit to assemble – middle and four toes – the process went quickly once we created the first few. They’ll look shaggy when you put them together but the edges will soften as they bake.
Sure they’re not smooth on top like the store-bought version but we were going for texture as we worked with this recipe. In the end, we all agreed that they really resemble bear paws.

If you’re not in assembly mode you could always roll the dough and use a hand-shaped cookie cutter to create these. Maybe there are paw-shaped cookie cutters out there too.
Whichever method you choose to shape these cookies, they’ll be delicious. The gentle spicing is wonderful and the texture is just so perfect.

Reader tip: Easy way to shape your paws:
“We were looking for an alternative to store bought bear paw cookies for school lunches. These turned out great. The dough is very soft, so we rolled about 2/3 of it into a log and chilled for half an hour. We rolled the remaining dough in thinner logs (less than 1 inch diameter) and chilled those also. Then we sliced discs from the logs and arranged into the palm and fingers. They turned out wonderfully and tasted even better. We quadrupled the ginger and cinnamon because we like them spicy. Thanks for the recipe, I can tell we will be making these again.”
PrintBear Paws | Old Fashioned Soft Molasses Cookies
Bear Paws cookies recipe with classic old fashioned soft molasses. The gentle spicing is wonderful (ginger & cinnamon) & the texture is just so perfect.
- Prep Time: 20 minutes
- Cook Time: 10 minutes
- Total Time: 30 minutes
- Yield: 20 cookies 1x
- Category: cookies
Ingredients
- 1/2 cup butter, softened
- 1/2 cup sugar
- 3/4 cup Crosby’s Fancy Molasses
- 1 large egg
- 1/4 cup hot water
- 2 tsp. baking soda
- 3 cups flour, spooned in (can use half whole grain)
- 1/2 tsp. ground ginger
- 1/2 tsp. ground cinnamon
- 1/4 tsp. salt
Instructions
Instructions:
- Preheat oven to 400°F and line cookie sheets with parchment paper.
- In a large bowl cream butter and sugar. Beat in molasses and egg.
- In a separate bowl whisk the flour, spices, and salt.
- Combine the hot water and baking soda in a little cup. Pour into the butter mixture and stir to combine.
- Add the dry ingredients and stir until incorporated.
To make the paws:
- Using a medium cookie scoop or a tablespoon, make the middle of the paws and then use a teaspoon measure to make four toes. This will be a little messy but will get easier once you have done a few.
- Bake in the preheated oven for 8-10 minutes. Let cookies cool for a few minutes before transferring to a rack to cool completely.
Keywords: bear paws, soft cookies, molasses


Raelynn
How would you adjust the recipe to make banana bear paws?
Tina
Delicious cookies , the recipe is perfect… I made them a few times now and everyone loves them and wants me to make more
Tina
I would love to be able to save right from here to Pinterest, which I use as my online recipe “book”. Adding a Pinterest button would be so helpful!
Denise Charron
Hi Bridget,
I just love molasses cookies but not really interested in making bear paws. Can I just roll the dough, and if so, to what thickness? Or, could I just roll the dough, chill it and then just slice it? (I will try the recipe using gluten-free flour). Thank you Bridget.
Red Fern
We were looking for an alternative to store bought bear paw cookies for school lunches. These turned out great. The dough is very soft, so we rolled about 2/3 of it into a log and chilled for half an hour. We rolled the remaining dough in thinner logs (less than 1 inch diameter) and chilled those also. Then we sliced discs from the logs and arranged into the palm and fingers. They turned out wonderfully and tasted even better. We quadrupled the ginger and cinnamon because we like them spicy. Thanks for the recipe, I can tell we will be making these again.
Crosby Molasses
Hi there, Thanks for your shaping suggestions. So much easier and more uniform than my way. I’ll update the recipe with your spicing suggestion.
Vicki Mathiesen
Can I adapt this recipe to Persimmon cookies with walnuts. I have been looking for a chewy soft Persimmon cookie recipe.
Crosby Molasses
Hi Vicki, I have never tasted a persimmon cookie so can’t provide much guidance. Sorry. Now I much search out a recipe!
Taryn
worked for me. kids loved them. yummy
Lynn Purdy
Taryn,
That’s great. Kid tested, kid approved.
Me
Bearhugably delicious ! Couldn’t keep my paws off of them.
Absolutely will make again. The cooking time was more 8 minutes than 10.
Lynn Purdy
I’m am happy that you found them so good. Don’t wait too long to make them again, keep those paws happy.
J
This recipe does work!
I almost did not try the recipe because of the previous comment. I’m glad I gave them a shot. They are tasty & look exactly like the photos. Would definitely recommend.
Avtar
This recipe does not work. The cookies melted in the oven and turned into a Pinterest fail. I followed the recipe exact and baked for 10 minutes. I did not touch them for atleast 2 minutes after removing from the oven because they were too soft. They taste ok but look nothing like as posted on the recipe. If anyone knows what could have possibly went wrong or had similar results please do let me know!
Crosby Molasses
Hi there, I just want to double check that you used our fancy molasses, not cooking molasses for the recipe.